Java使用HttpUtils实现发送HTTP请求
第一部分:简单总结HTTP请求常用配置
第二部分:使用JavaLib的HttpUtils
第三部分:分享HttpUtils是如何封装的
HTTP请求,在日常开发中,还是比较常见的,今天给大家分享HttpUtils如何使用。
阅读本文,你将收获:
简单总结HTTP请求常用配置;
JavaLib中HttpUtils如何使用;
如何封装HTTP请求工具类。
第一部分:简单总结HTTP请求常用配置大家好,在 Java 开发中,经常遇到需要调用第三方提供的接口服务,常见的形式是 HTTP + JSON,下面,就对 http 请求常见的设置,做一个说明
http提供多种请求方式,以满足我们日常需要,先按请求方式来做说明:
GET
POST
PUT
PATCH
DELETE
在 RESTful API 开发中,我们可以根据这些请求方式设计我们的API接口。举例:
GET:获取资源
POST:提交资源
PUT:更新完整资源
PATCH:更新部分资源
DELETE:删除资源
参数格式
form表单
json
其他
超时时间设置
第二部分:使用JavaLib的HttpUtils简单的get请求
System.out.println(HttpUtils.get("https://www.baidu.com"));
响应结果:
<!DOCTYPE html><!--STATUS OK--><html> <head><meta http-equiv=content-type content=text/html;charset=utf-8><meta http-equiv=X-UA-Compatible content=IE=Edge><meta content=always name=referrer><link rel=stylesheet type=text/css href=https://ss1.bdstatic.com/5eN1bjq8AAUYm2zgoY3K/r/www/cache/bdorz/baidu.min.css><title>百度一下,你就知道</title></head> <body link=#0000cc> <div id=wrapper> <div id=head> <div class=head_wrapper> <div class=s_form> <div class=s_form_wrapper> <div id=lg> <img hidefocus=true src=//www.baidu.com/img/bd_logo1.png width=270 height=129> </div> <form id=form name=f action=//www.baidu.com/s class=fm> <input type=hidden name=bdorz_come value=1> <input type=hidden name=ie value=utf-8> <input type=hidden name=f value=8> <input type=hidden name=rsv_bp value=1> <input type=hidden name=rsv_idx value=1> <input type=hidden name=tn value=baidu><span class="bg s_ipt_wr"><input id=kw name=wd class=s_ipt value maxlength=255 autocomplete=off autofocus=autofocus></span><span class="bg s_btn_wr"><input type=submit id=su value=百度一下 class="bg s_btn" autofocus></span> </form> </div> </div> <div id=u1> <a href=http://news.baidu.com name=tj_trnews class=mnav>新闻</a> <a href=https://www.hao123.com name=tj_trhao123 class=mnav>hao123</a> <a href=http://map.baidu.com name=tj_trmap class=mnav>地图</a> <a href=http://v.baidu.com name=tj_trvideo class=mnav>视频</a> <a href=http://tieba.baidu.com name=tj_trtieba class=mnav>贴吧</a> <noscript> <a href=http://www.baidu.com/bdorz/login.gif?login&tpl=mn&u=http%3A%2F%2Fwww.baidu.com%2f%3fbdorz_come%3d1 name=tj_login class=lb>登录</a> </noscript> <script>document.write('<a href="http://www.baidu.com/bdorz/login.gif?login&tpl=mn&u='+ encodeURIComponent(window.location.href+ (window.location.search === "" ? "?" : "&")+ "bdorz_come=1")+ '" name="tj_login" class="lb">登录</a>'); </script> <a href=//www.baidu.com/more/ name=tj_briicon class=bri style="display: block;">更多产品</a> </div> </div> </div> <div id=ftCon> <div id=ftConw> <p id=lh> <a href=http://home.baidu.com>关于百度</a> <a href=http://ir.baidu.com>About Baidu</a> </p> <p id=cp>©2017 Baidu <a href=http://www.baidu.com/duty/>使用百度前必读</a> <a href=http://jianyi.baidu.com/ class=cp-feedback>意见反馈</a> 京ICP证030173号 <img src=//www.baidu.com/img/gs.gif> </p> </div> </div> </div> </body> </html>
通过简单尝试,证明两点:
一是,这个还是可以使用的;二是,原来使用如此简单。
如果要你手写一个http请求,或许你脑海里一篇空白,会去搜索各种资料。
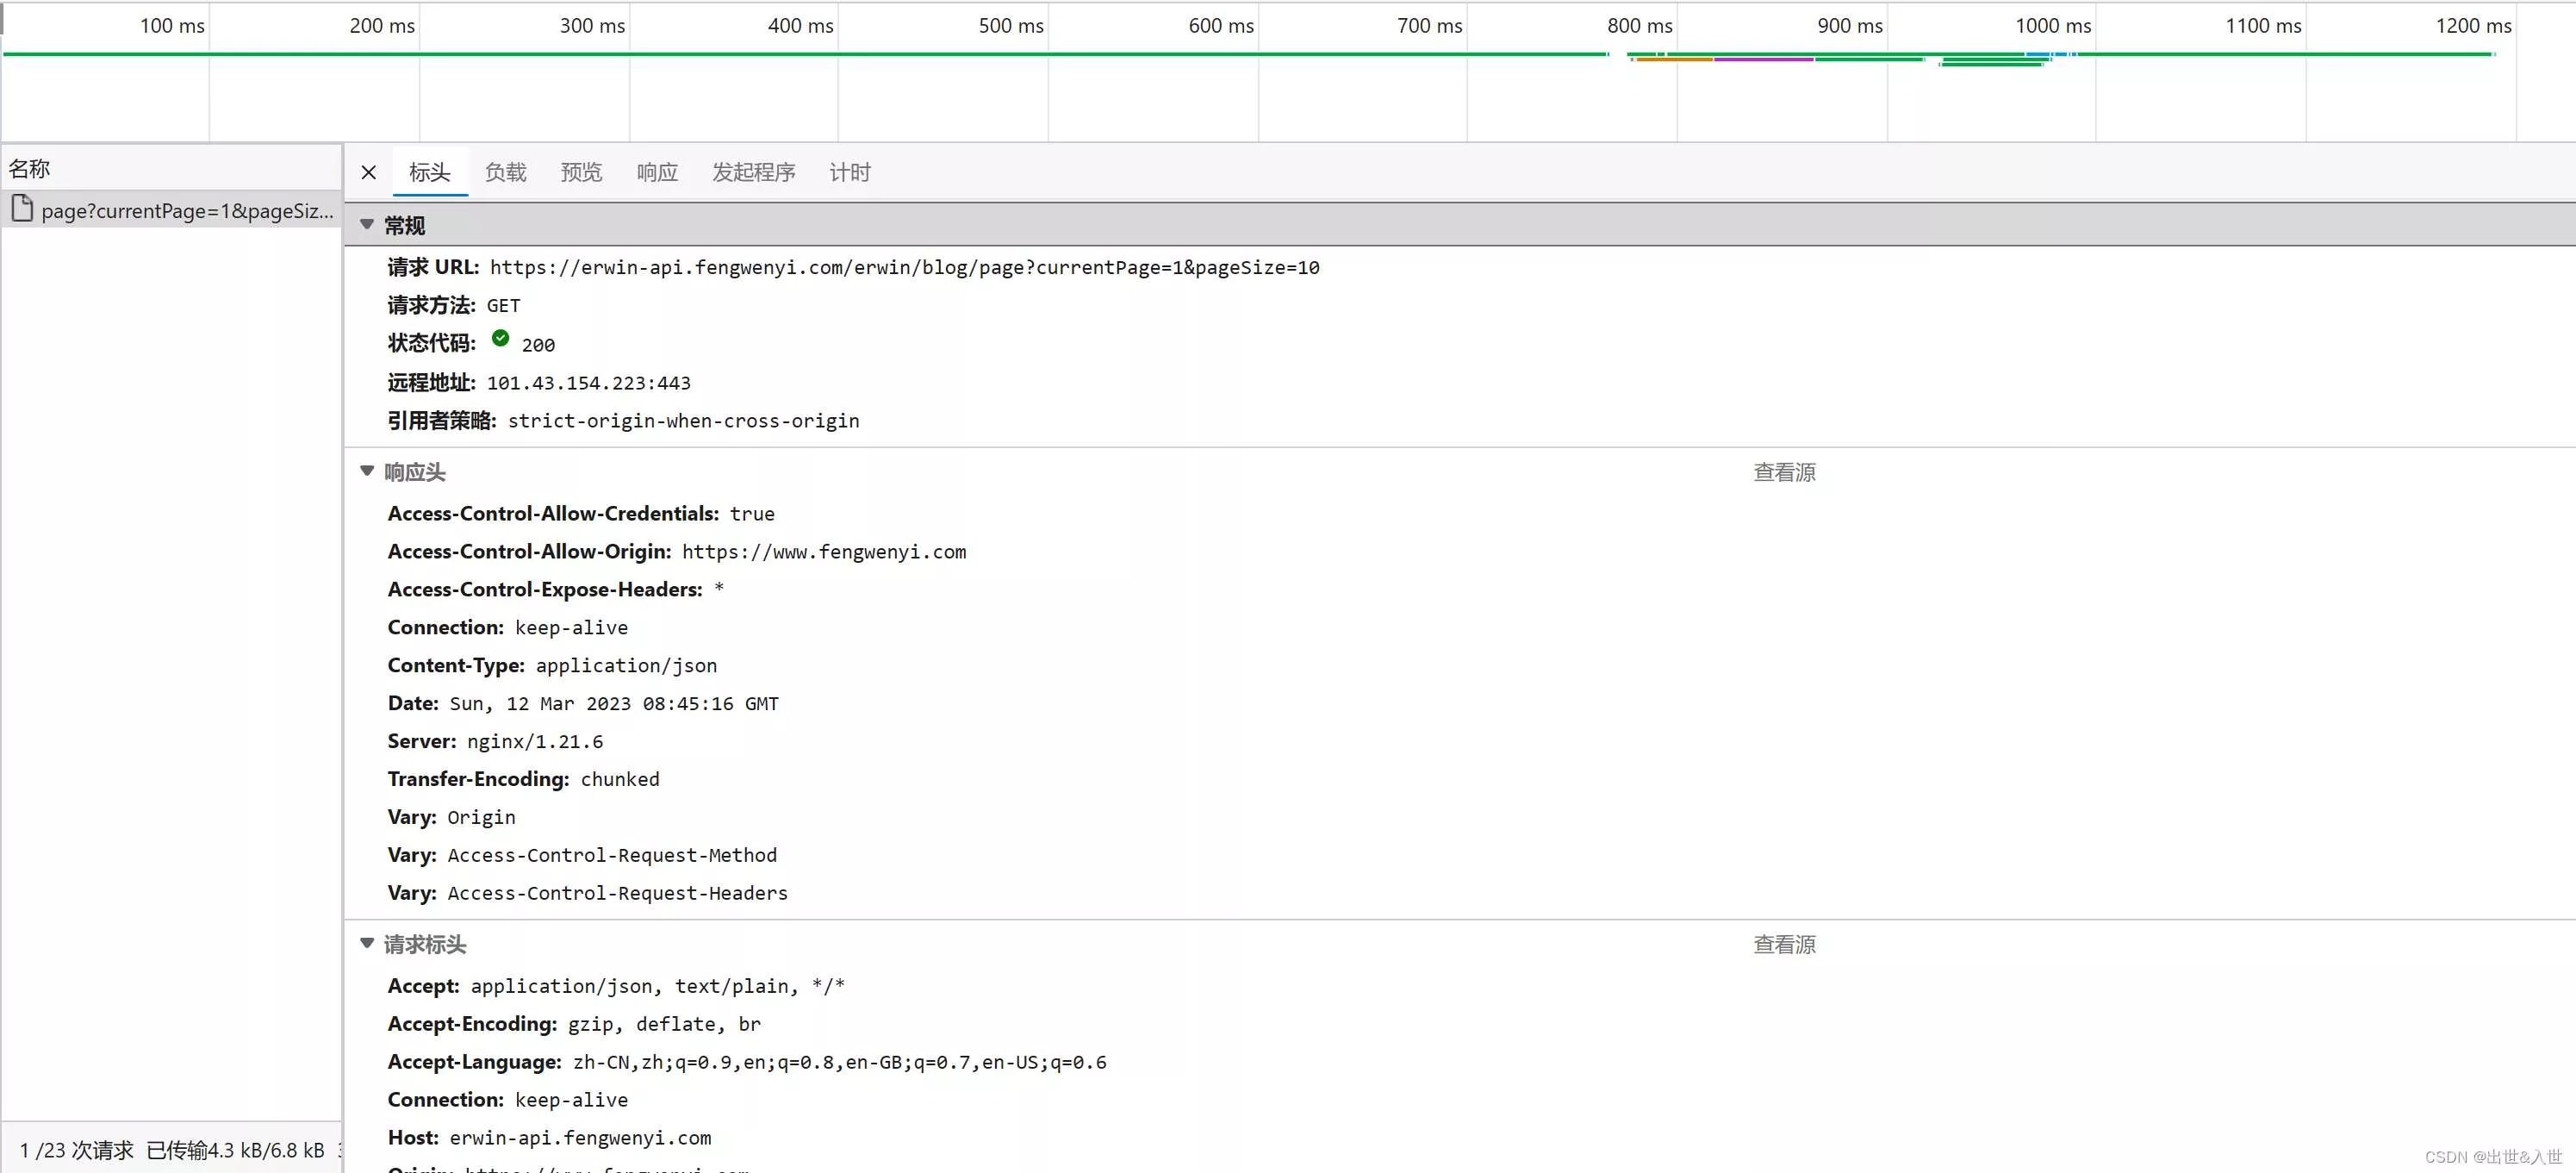
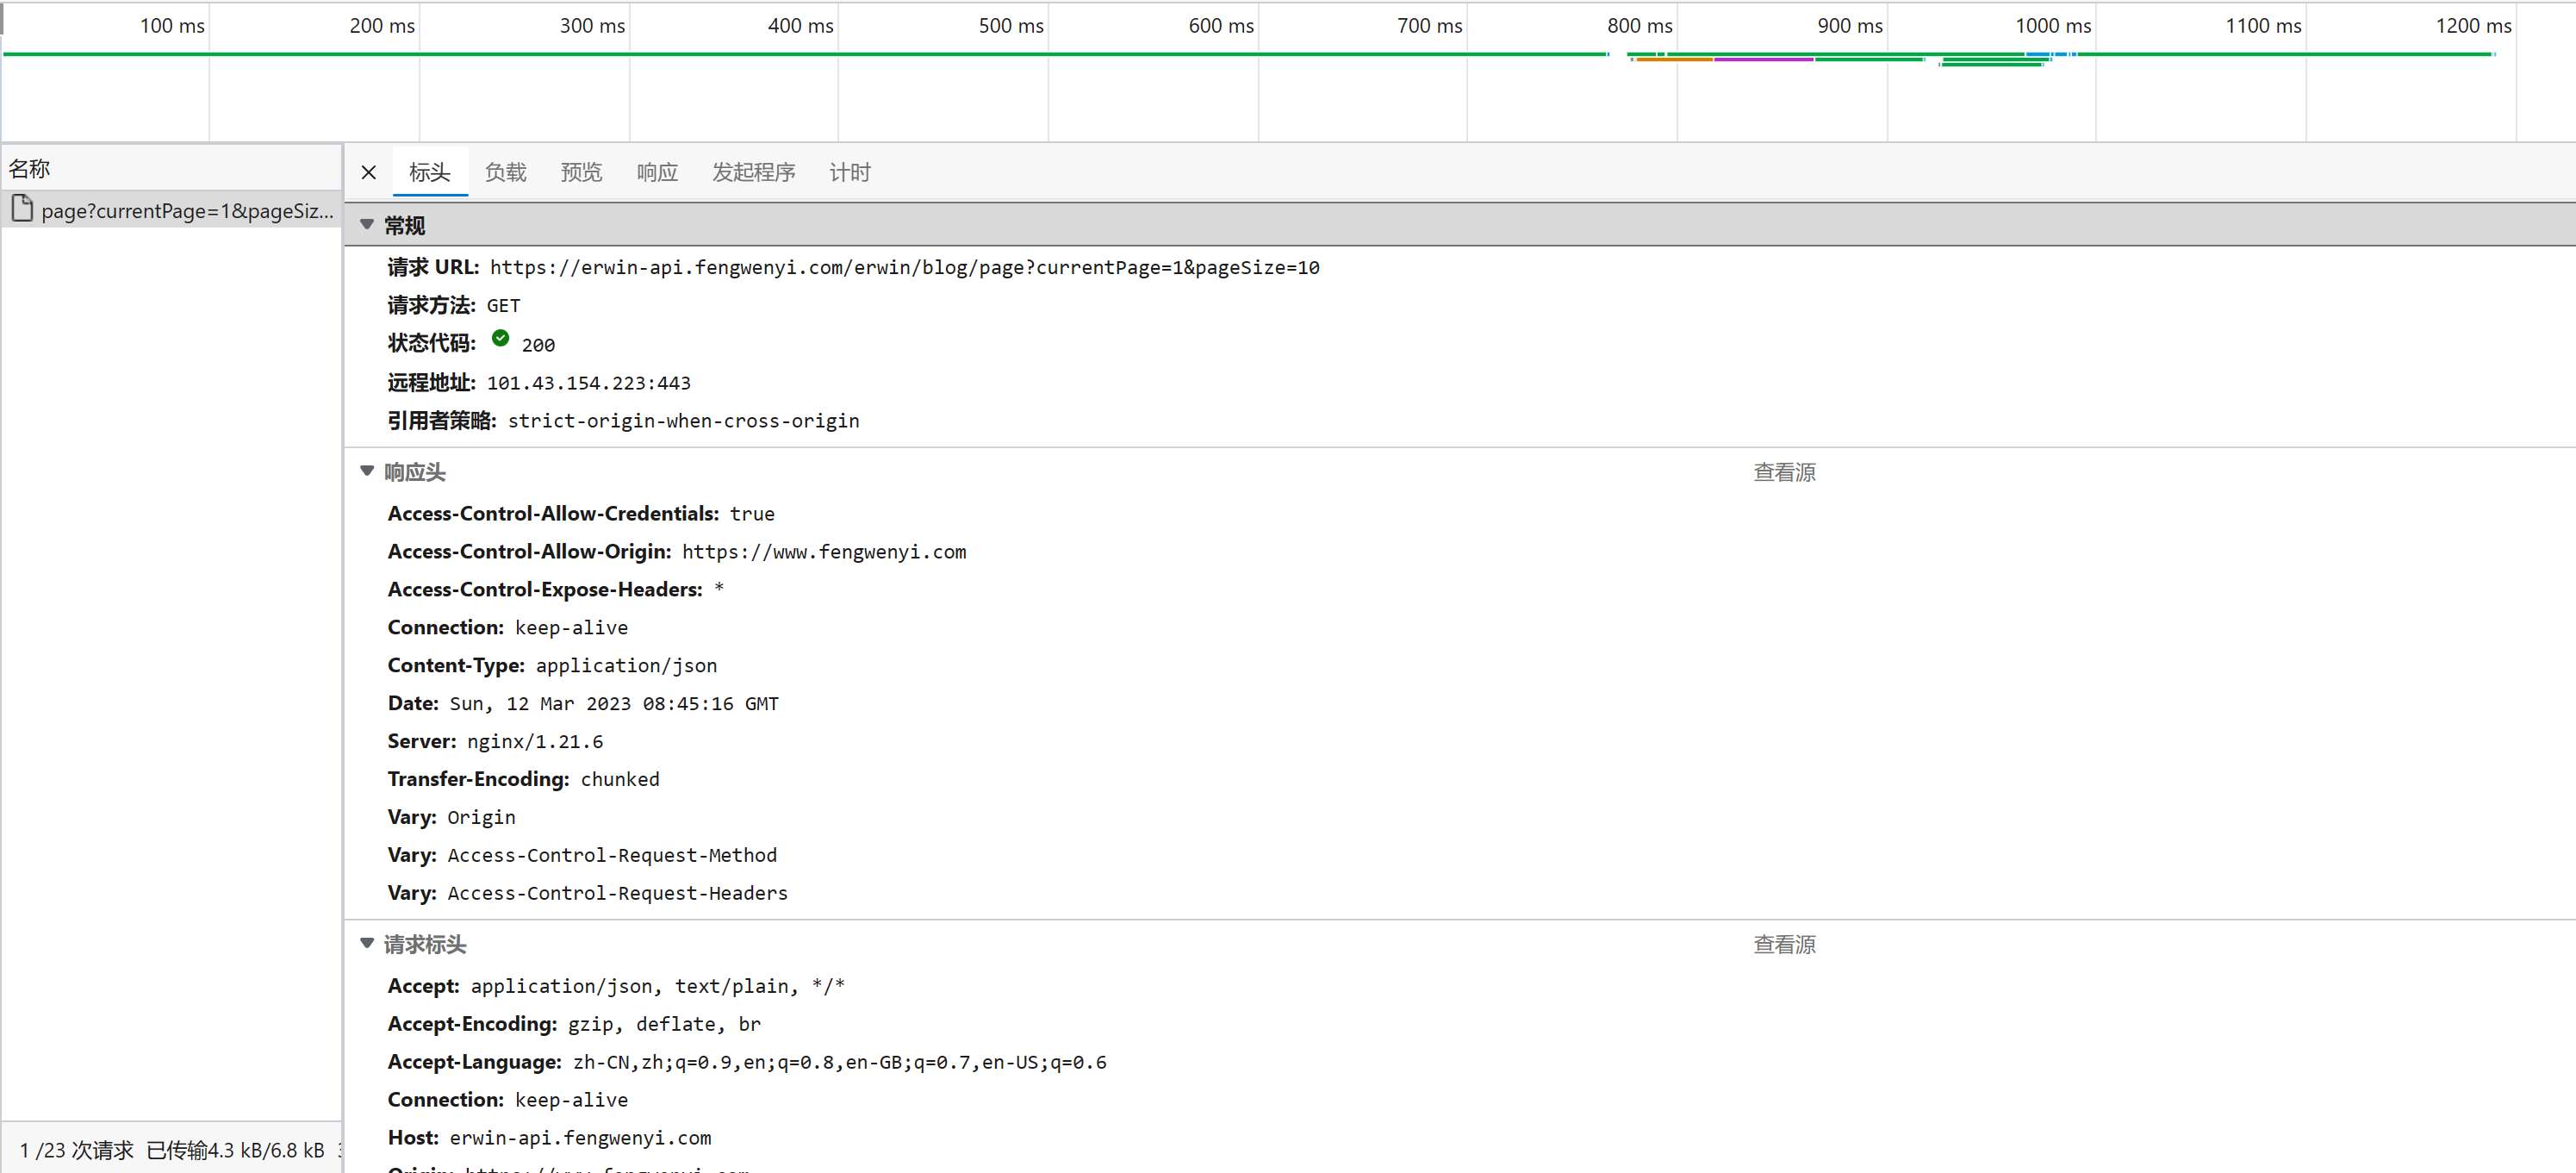
我们再试一个复杂的
接口:
接口地址:https://erwin-api.fengwenyi.com/erwin/blog/page请求方法:GET
参数:currentPage,pageSize
参数格式:form
响应:application/json
String url = "https://erwin-api.fengwenyi.com/erwin/bookmark/page?currentPage=1&pageSize=10";
Request request = new Request();
request.setUrl(url);
request.setMethod(Request.Method.GET);
Map<String, String> headerMap = new HashMap<>();
headerMap.put("Accept", "application/json");
Request.Option option = new Request.Option();
option.setHeaders(headerMap);
try {
    System.out.println(HttpUtils.execute(request, option));
} catch (IOException e) {
    throw new RuntimeException(e);
}
响应结果:
{
    "code":"SUCCESS",
    "message":"Success",
    "success":true,
    "header":null,
    "body":{
        "currentPage":1,
        "pageSize":10,
        "totalRows":661,
        "totalPages":67,
        "content":[
            {
                "id":"1634772578877935617",
                "timestamp":1678595130000,
                "enabledState":null,
                "name":"VScode 中文显示出现黄色方框的解决方法_vscode汉字被框住_YJer的博客-CSDN博客",
                "url":"https://blog.csdn.net/qq_33249042/article/details/123252625",
                "icon":null,
                "classifyName":"软件",
                "classifyId":"1522587269600481281"
            },
            {
                "id":"1632640455110922241",
                "timestamp":1678086792000,
                "enabledState":null,
                "name":"Spring中init-method和destroy-method的四种方式_星夜孤帆的博客-CSDN博客",
                "url":"https://blog.csdn.net/qq_38826019/article/details/117387398",
                "icon":null,
                "classifyName":"Spring",
                "classifyId":"1522586360887742466"
            },
            {
                "id":"1631597310596190209",
                "timestamp":1677838087000,
                "enabledState":null,
                "name":"vue3 + elemenplus实现导航栏 - 掘金",
                "url":"https://juejin.cn/post/7084871748608327687",
                "icon":null,
                "classifyName":"前端",
                "classifyId":"1525554881275990018"
            },
            {
                "id":"1631593154401636354",
                "timestamp":1677837096000,
                "enabledState":null,
                "name":"Spring bean 创建过程源码解析 - 腾讯云开发者社区-腾讯云",
                "url":"https://cloud.tencent.com/developer/article/1631160",
                "icon":null,
                "classifyName":"Spring",
                "classifyId":"1522586360887742466"
            },
            {
                "id":"1631592987673858050",
                "timestamp":1677837056000,
                "enabledState":null,
                "name":"SpringBoot之容器启动源码分析与Bean加载_springboot加载bean 源码_minemine0418的博客-CSDN博客",
                "url":"https://blog.csdn.net/minemine0418/article/details/102308912",
                "icon":null,
                "classifyName":"Spring Boot",
                "classifyId":"1522586446766116865"
            },
            {
                "id":"1631586585454678018",
                "timestamp":1677835530000,
                "enabledState":null,
                "name":"Spring-Bean生命周期 - 知乎",
                "url":"https://zhuanlan.zhihu.com/p/158468104",
                "icon":null,
                "classifyName":"Spring",
                "classifyId":"1522586360887742466"
            },
            {
                "id":"1631579732104548354",
                "timestamp":1677833896000,
                "enabledState":null,
                "name":"一文读懂 Spring Bean 的生命周期_spring bean的生命周期_老周聊架构的博客-CSDN博客",
                "url":"https://blog.csdn.net/riemann_/article/details/118500805",
                "icon":null,
                "classifyName":"Spring",
                "classifyId":"1522586360887742466"
            },
            {
                "id":"1630768897186697218",
                "timestamp":1677640578000,
                "enabledState":null,
                "name":"MySQL同时统计多个条件的记录条数_ztnhnr的博客-CSDN博客",
                "url":"https://blog.csdn.net/ztnhnr/article/details/107165942",
                "icon":null,
                "classifyName":"MySQL",
                "classifyId":"1522586805693681666"
            },
            {
                "id":"1630768792098410497",
                "timestamp":1677640553000,
                "enabledState":null,
                "name":"sql查询近七天,近两周,近一个月的数据_sql最近一周数据_心诚则灵'的博客-CSDN博客",
                "url":"https://blog.csdn.net/wenchangwenliu/article/details/119891790",
                "icon":null,
                "classifyName":"MySQL",
                "classifyId":"1522586805693681666"
            },
            {
                "id":"1630480535938764801",
                "timestamp":1677571827000,
                "enabledState":null,
                "name":"开源流程引擎哪个好,如何选型? - 知乎",
                "url":"https://zhuanlan.zhihu.com/p/369761832",
                "icon":null,
                "classifyName":"Java",
                "classifyId":"1522586296119300097"
            }
        ]
    }
}
响应结果,还是符合预期的。
当然,HTTP还有其他,比如超时等等,下面看看完整版的请求示例:
Map<String, Object> paramMap = new HashMap<>();
paramMap.put("currentPage", 1);
paramMap.put("pageSize", 10);
Map<String, String> headerMap = new HashMap<>();
headerMap.put("Accept", "application/json");
Request request = new Request();
request.setUrl("https://erwin-api.fengwenyi.com/erwin/bookmark/page");
request.setParam(paramMap);
request.setMethod(Request.Method.GET);
request.setUtil(Request.Util.OkHttp);
Request.Option option = new Request.Option();
option.setHeaders(headerMap);
option.setConnectTimeoutSecond(3);
option.setReadTimeoutSecond(5);
option.setLogLevel(Request.LogLevel.DEBUG);
try {
    String result = HttpUtils.execute(request, option);
    System.out.println(result);
} catch (IOException e) {
    throw new RuntimeException(e);
}
响应结果也是跟上面一样的。
第三部分:分享HttpUtils是如何封装的首先是 Request 和 Response 对应HTTP的请求和响应,包路径如下:
com.fengwenyi.javalib.http.Request
com.fengwenyi.javalib.http.Response
另外,com.fengwenyi.javalib.http.Request.Option 来存放HTTP参数配置。
这一部分的思路来源是 Spring Cloud OpenFeign。
为了兼容多种HTTP工具实现请求,引入了 HttpClientFactory,其他工具类,只要实现 HttpClient 接口,就行。
com.fengwenyi.javalib.http.client.HttpClient
com.fengwenyi.javalib.http.client.HttpClientFactory
欧克,下面我们就以代码来看看:
HttpUtils#execute
public static String execute(Request request, Request.Option option) throws IOException {
    check(request);
    HttpClient httpClient = HttpClientFactory.get(request.getUtil());
    Response response = httpClient.execute(request, option);
    return handleResponse(response);
}
HttpClientFactory#get
public static HttpClient get(Request.Util httpUtil) {
    if (Request.Util.JDK == httpUtil) {
        return new JdkHttpClient();
    } else if (Request.Util.OkHttp == httpUtil) {
        return new OkHttpClient();
    } else {
        throw new RuntimeException("not find http util: " + httpUtil.name());
    }
}
所以,只需要实现 HttpClient#execute 接口就行。
Response execute(Request request, Request.Option option) throws IOException;
到此这篇关于Java使用HttpUtils实现发送HTTP请求的文章就介绍到这了,更多相关HttpUtils实现发送HTTP请求内容请搜索软件开发网以前的文章或继续浏览下面的相关文章希望大家以后多多支持软件开发网!